fitting and optimisation

steps

RANDALLfoil’s are simple to install, however, do require accurate fitting. If you belong to a club, there will usually be a person with experience in boat repair or the use of adhesive – ask them for assistance. Also, there is a growing number of professional people with experience fitting RANDALLfoils.


PDF Instructions

eQUIPMENT

Materials required

  • Randall foil sets
  • Hair Drier
  • Sharp Pencil
  • Sandpaper
  • Stanley knife
  • Adhesive
  • Duct Tape or Clamps (for bracing and clamping)
  • Masking Tape (for masking outside the attachment area)
PREPARATION
  • Heat foils with a Hair Drier to assist fitting – Especially C2 Blades
  • Use sandpaper to remove any paint or glossy surface. The adhesive needs a light surface texture for it to bite.
  • Pencil mark the attachment area – WITHOUT adhesive, place the Randall foil’s on the oars, line up with the outside edge of the blade. Draw around the Randall foil’s – Mark the end with an extra line to indicate where the small end lines up.
  • Place masking tape around the outside edge of the pencil line for easy clean-up as the adhesive is very strong!
  • Pre-cut 5 pieces of duct tape about 20cm in length. Have them within reach.
ATTACHING
  • Fill the Randall foil slot and back surface with the adhesive. Ensure there is more adhesive than required, as the adhesive needs to fill all of the notches and groves.
  • Attach the SMALLER end first – brace with duct tape firmly down the BACK edge. As The adhesive will start filling the cavity and any excess will ooze out. Work from the smaller to the wider end of the Randall foil.
  • Proceed along until the entire foil is firmly set down. The shape is designed for a tight fit and may be like fitting a bicycle tyre. Don’t be afraid to apply pressure to the foil as it will conform to the shape of the blade.
EXTRA STRENTH

Additional Strengthening Options

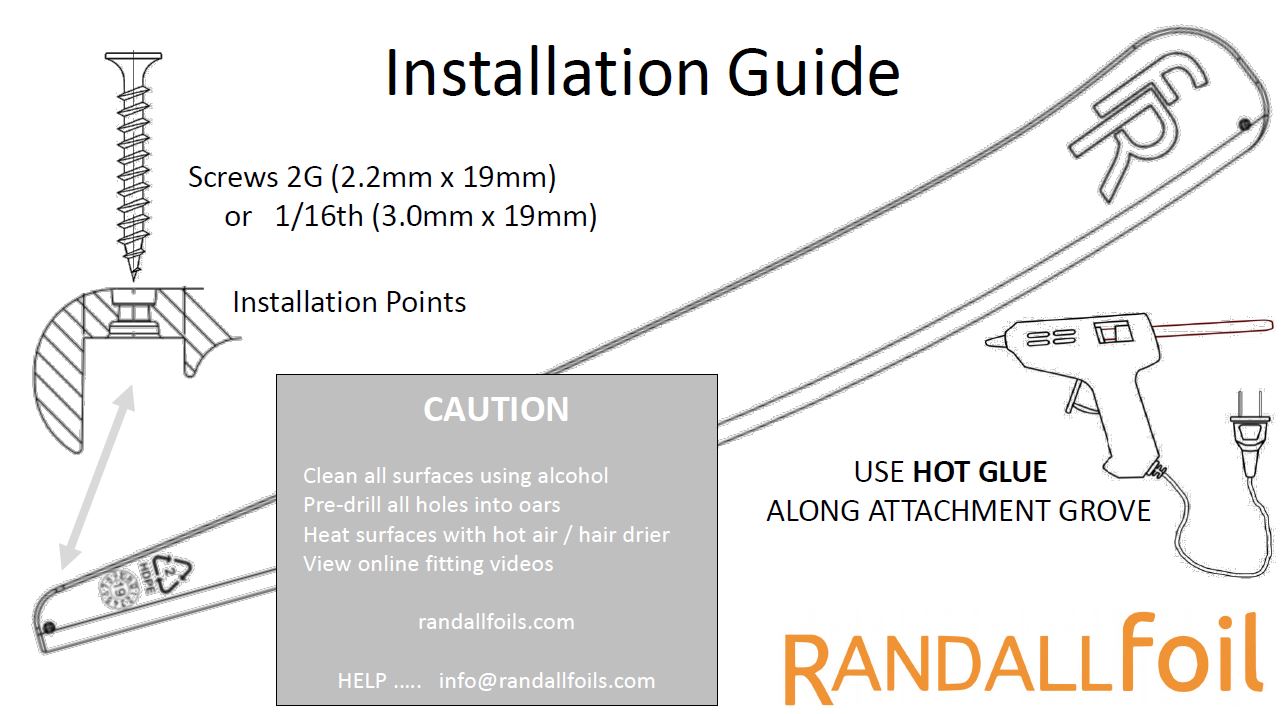
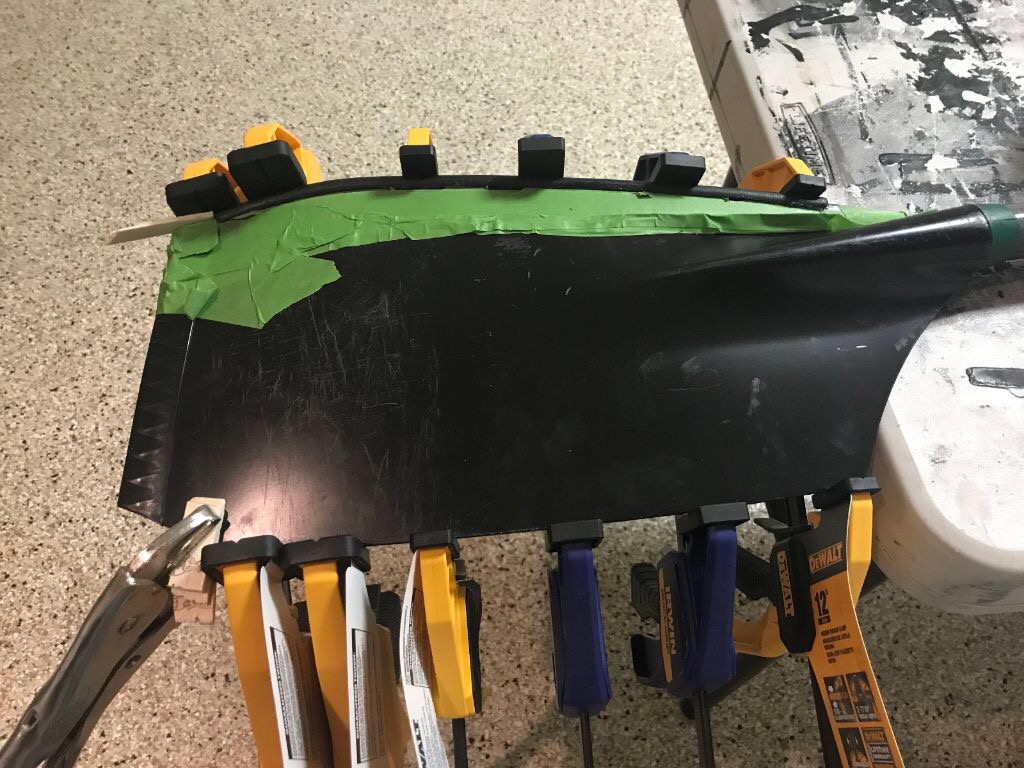
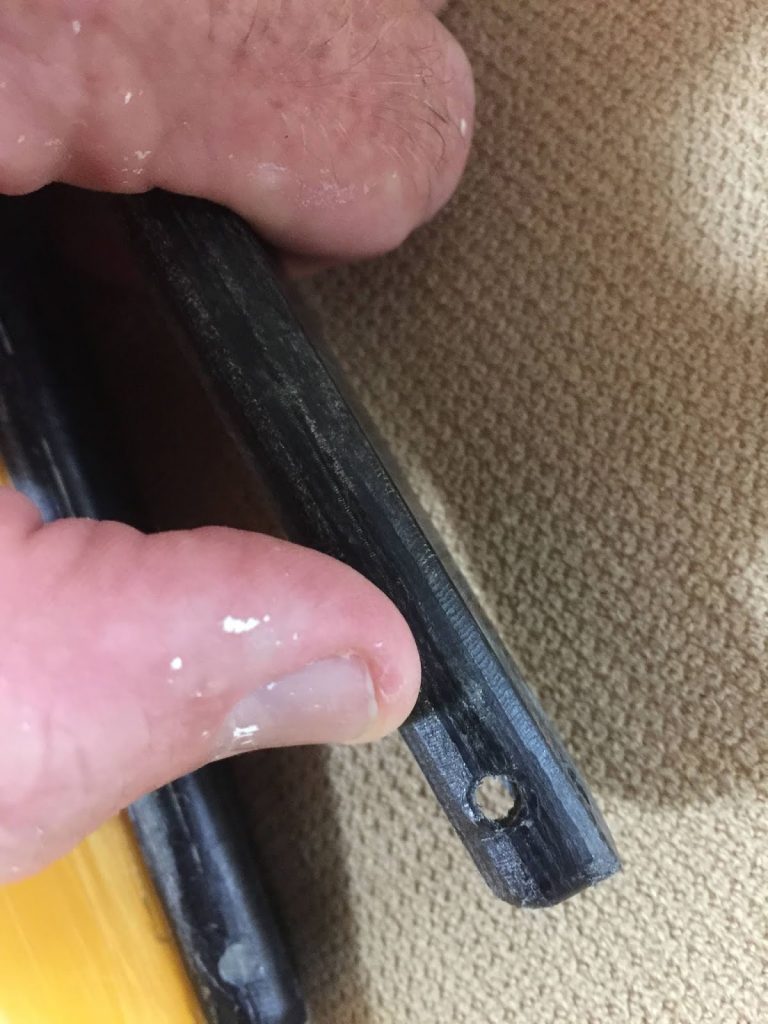
1. – Drill 3mm holes into the foil through the joining slot. The adhesive resin will fill the cavity creating a strengthening bolt. (Pictured Above)

2. Screws may also be used for securing foils to blades. Drill down from the top of the foil into the blade. Use adhesive as well as screws. (Pictured Above)


x-TACK tec 7 - recommended

 X-TACK TEC 7 Adhesive has now been fully tested and is available for sale here.

VORTEX STRIP

 RANDALLfoil’s make the Vortex Strip obsolete and I recommend removal of the strip. Where the Vortex Strip cannot be removed, you will need to ensure it does not overlap.

PITCHING
  • Raise your gates at least 2 washers (6mm) as you won’t be burying your blade as deeply. This is important as you want to keep your hand heights the same as you are practised. Without this change, you will be fighting against the design of the foil and be forcing the blade down below the surface. 
  • Pitch your Blades at or close to 0-degrees with pins set at 0-degree – IMPORTANT : 0- degrees pitch is optimal for foil performance. Without this change, you will experience a sensation of wash or water turbulence during the stroke. DO NOT USE 4-DEGREES OR ABOVE.
  • Gate inserts can be used to alter pitch. You will need gate inserts No.7 = 1-degrees / No.6 = 2-degrees / No.5 = 3-degrees
  • Top insert faces away from the gate
  • Bottom insert faces toward the gate
Gates and inserts may be purchased here